

Creating your server
Every Discord server is unique and has its own soul. You don't have to start with a complicated structure, it's often better to start simple and add or remove channels as the community grows.
A server that's too complex from the start feels empty and intimidating. If you have 20 people and 40 channels, the community looks dead. Better to start with a few useful channels and expand gradually.
A base structure
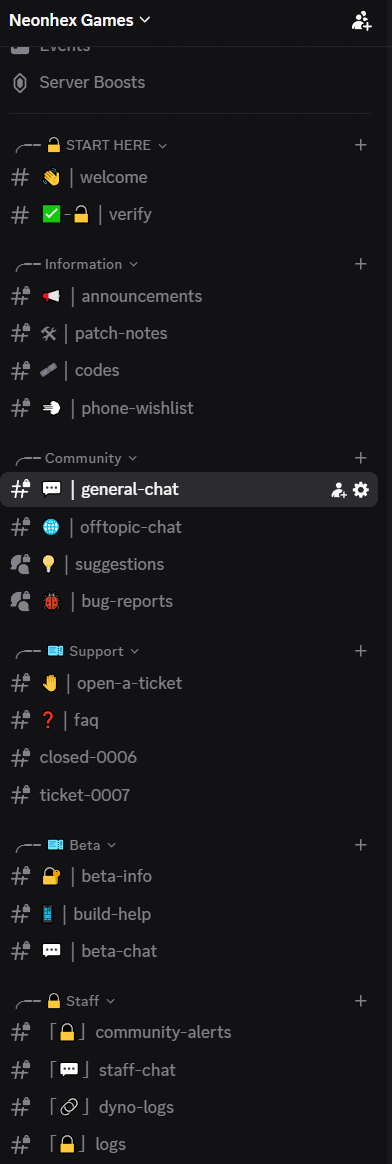
A good starting point for a live or in-development game:
╭── 🔒 START HERE
# 👋|welcome
# ✅|verify

╭── Information
# 📢|announcements
# 🛠|patch-notes
# 🎟|codes
# 📲|phone-wishlist

╭── Community
# 💬|general-chat
# 🌐|offtopic-chat
# 💡|suggestions
# 🐞|bug-reports

╭── Support
# 👋|open-a-ticket
# ❓|faq

╭── Beta
# 🔐|beta-info
# 📱|build-help
# 💬|beta-chat

╭── 🔒 Staff
# 📢|community-alerts
# 💬|staff-chat
# 🔗|dyno-logs
# 🔒|logs
The important categories
START HERE
The first place a user lands: welcome, verify, short rules, important links and instructions on how to access the rest of the server.
If you use a verification bot, users should not see the whole server until they pass a minimal confirmation step. It doesn't have to be complicated, but it helps a lot against spam and automated accounts.
Information
The official area of the server: announcements, patch-notes, codes, faq, known-issues.
The announcements channel is very important: people should see only official information there, not random conversations. Use it for launches, downtime, events, patch notes, codes and important explanations.
Community
The lively area of the server: general-chat, offtopic-chat, suggestions, bug-reports, plus optionally guides, strategy, fan-art, showcase.
Watch the volume. Too many channels → the conversation scatters. Too few → everything becomes chaotic. Start simple and split channels only when you truly need to.
Support
Discord can be a very good support channel. Instead of pulling the user out of the community to ask for help, you bring them into the community and offer support there, usually through a ticket system (see bots). Useful for: account issues, purchase issues, individual bugs, reports, build help, private feedback, moderation appeals.
Don't turn all support into public chaos. Some things must be discussed privately, especially when they involve user IDs, purchases, accounts or sensitive information.
Beta
A beta access category can be very valuable: beta-info, build-help, beta-chat, beta-bug-reports, beta-feedback. You give access to the most vocal players, those who give good feedback, payers, veterans, moderators and people who report bugs consistently.
A good beta group saves you a lot of time: you test events, economy, difficulty, bugs, UX and reactions before you ship the update to your whole user base.
Staff
The staff area must be private: staff-chat, community-alerts, logs, mod-log, bot-logs, reported-users, internal-notes. This is where moderators, developers and community managers talk, it shouldn't be accessible to normal users.
The server profile
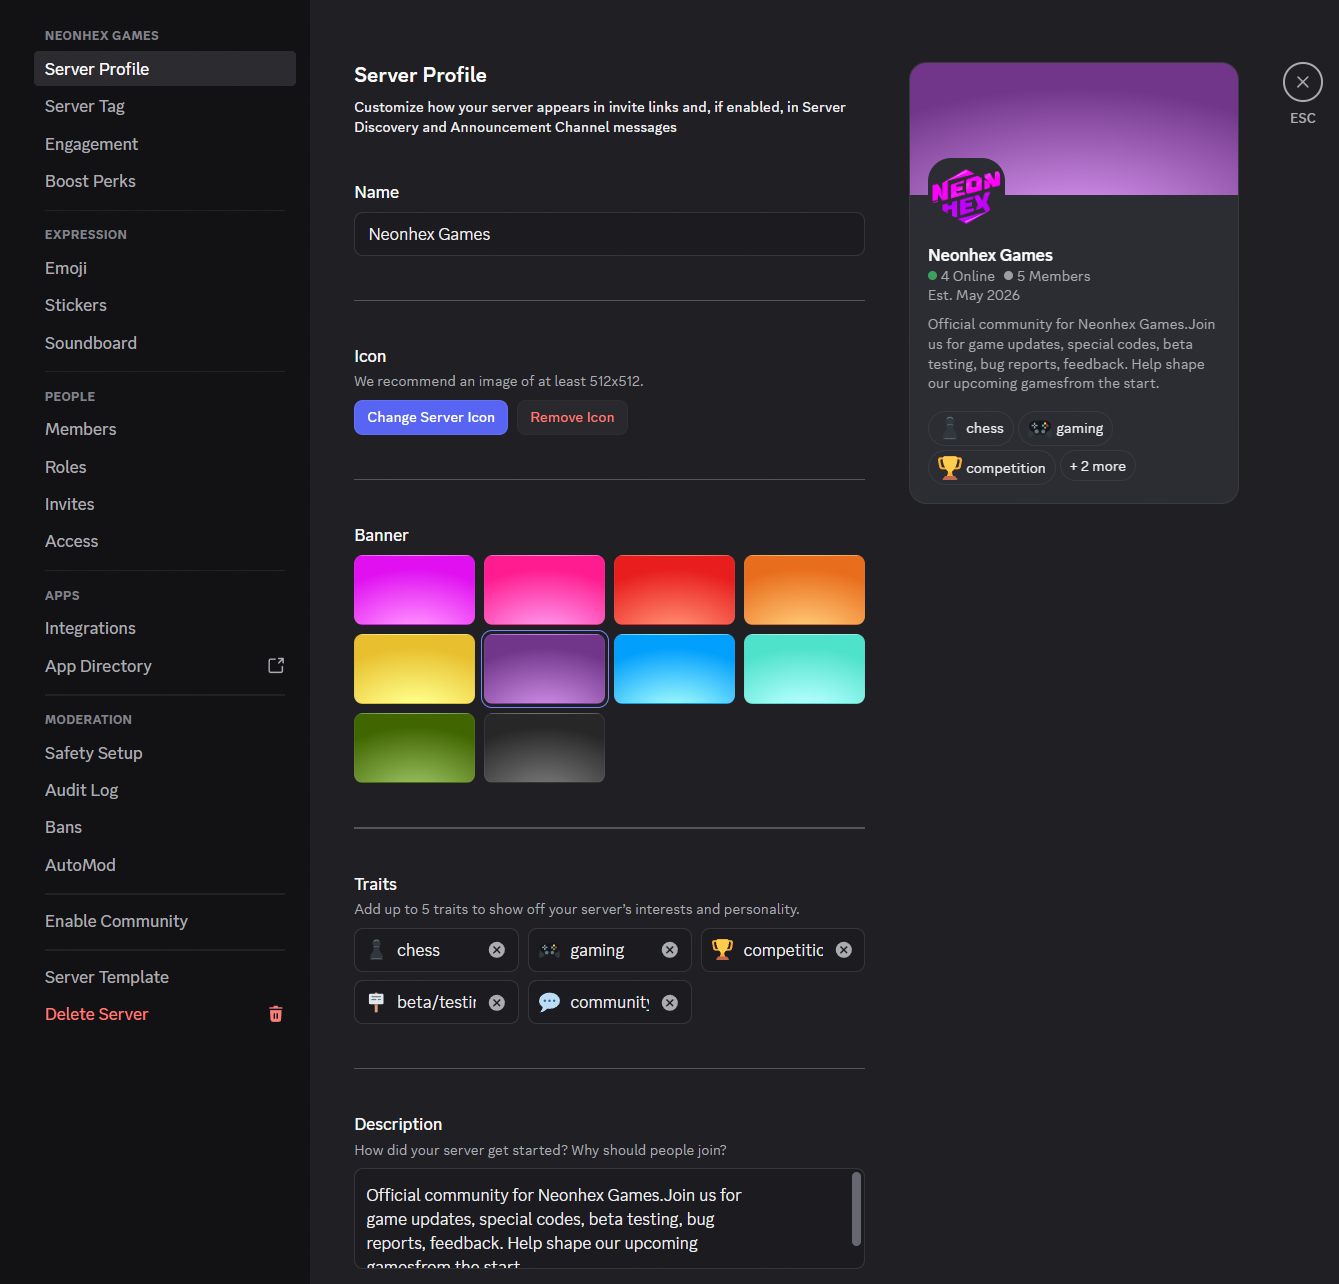
From Server Settings → Server Profile you set the name, icon (recommended at least 512×512), banner, traits and description. These show up in invites and, if you enable Community, in Server Discovery.
Invite links
In an invite's settings you can choose the expiry (from 30 min to Never), the maximum number of uses and whether it grants temporary membership. For a public community link you usually want Never and no usage limit.
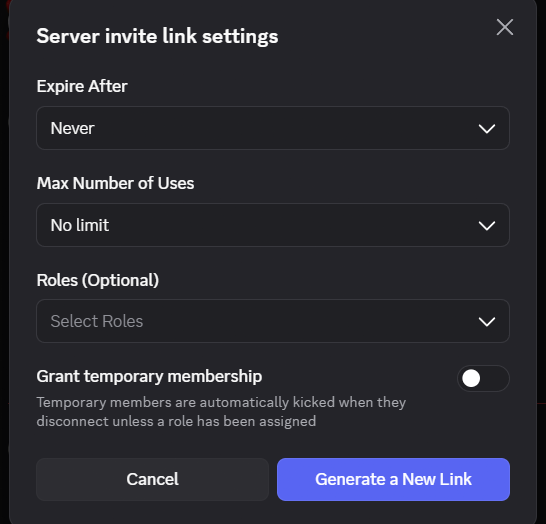
For sensitive roles/access, be careful with the Grant temporary membership option, users without a role are automatically kicked when they disconnect. Use it intentionally, not by mistake.
Community Server
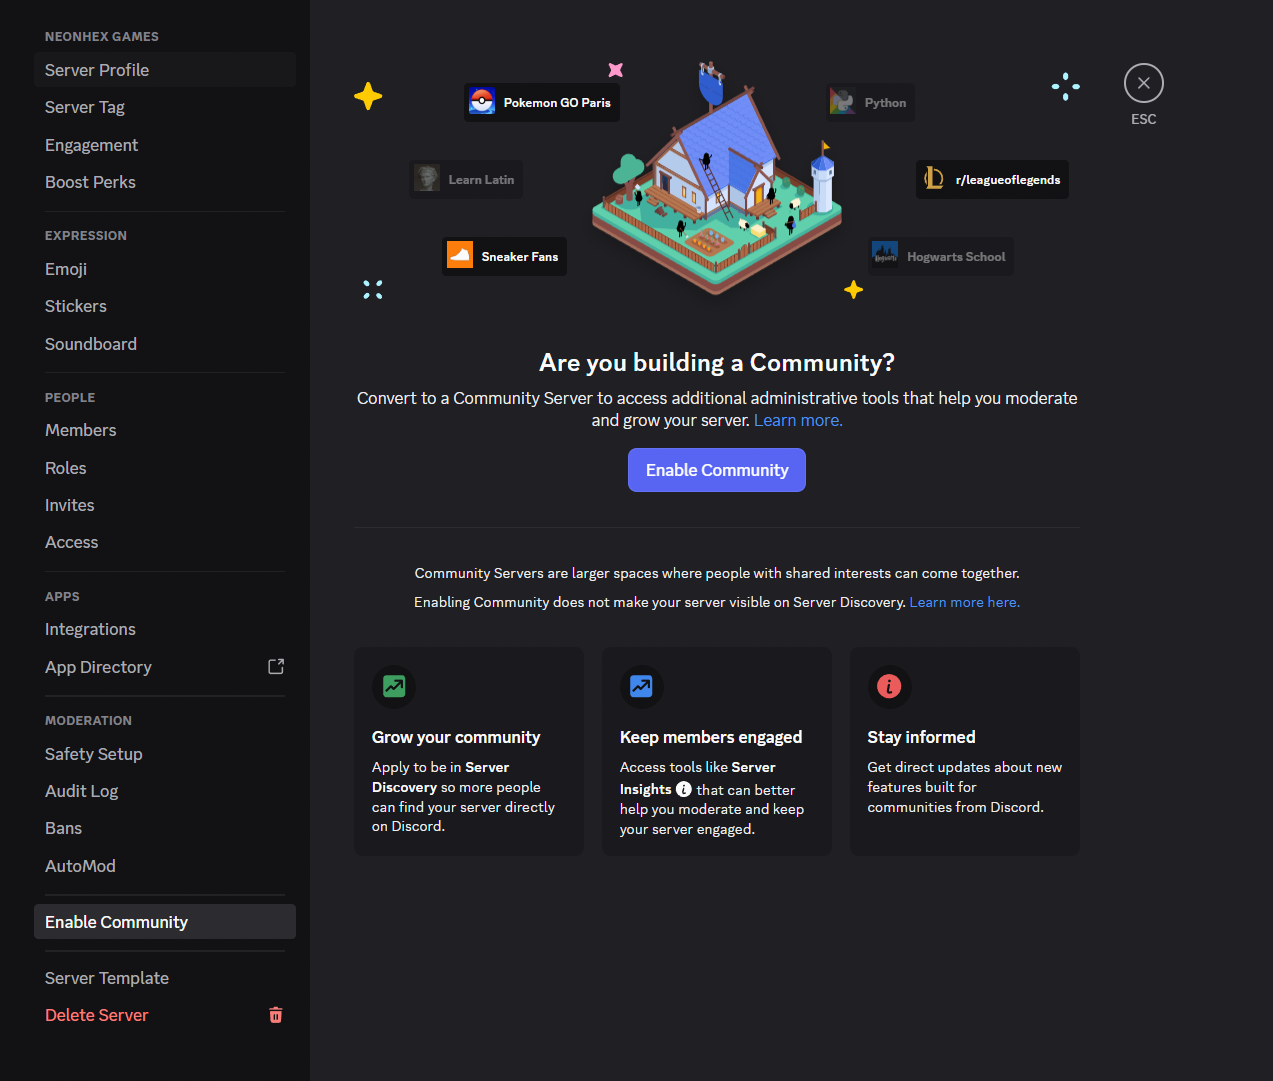
From Enable Community you turn the server into a Community Server and unlock moderation and growth tools (announcement channels, Server Insights, AutoMod, eventually Server Discovery). For a game, it's worth enabling once the server starts to grow.
Next step
Now that you have the structure, move on to good bots to start with and then to roles and settings, where you build the permission and rules matrix.